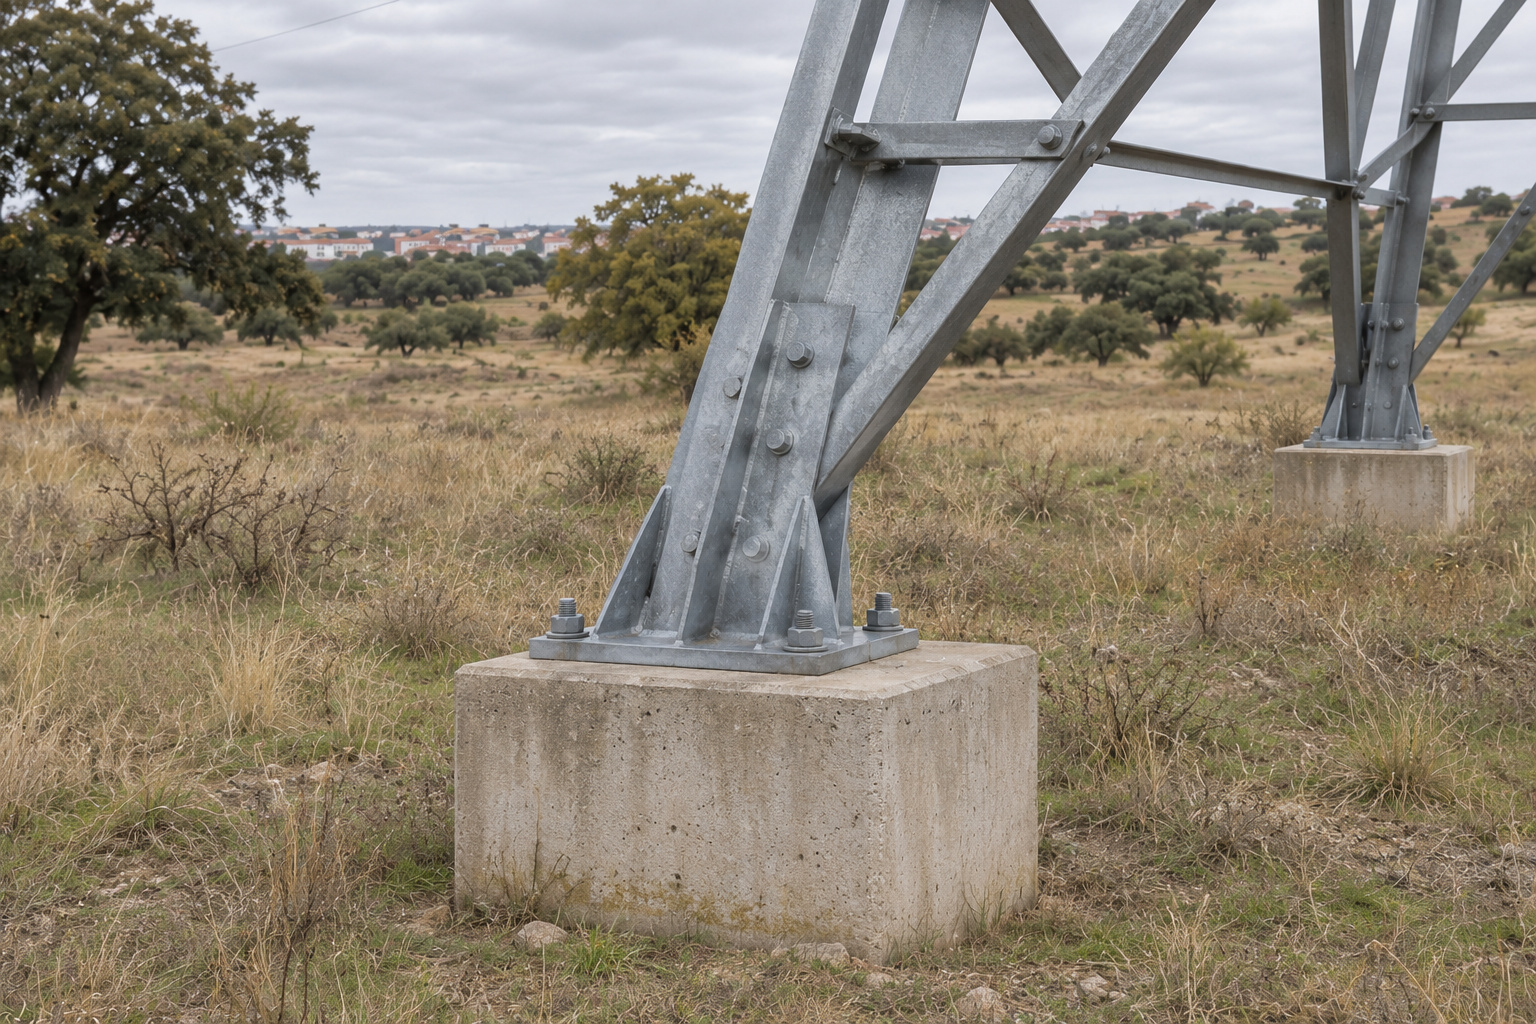
Photos
We start with what can be seen up close. We open a photo of the pylon and go through foundations, joints and insulators: the concrete base, the joint between two steel sections, the insulator string. The photos are gathered in the same project and keep the reference to the pylon, so when we return to an image there is no need to guess which tower it belongs to. When the photo contains valid geolocation data, Pic on Site places it at its point on the line. An image shows the visible condition; it does not on its own determine whether a component is correctly installed: that is decided by whoever reviews it.
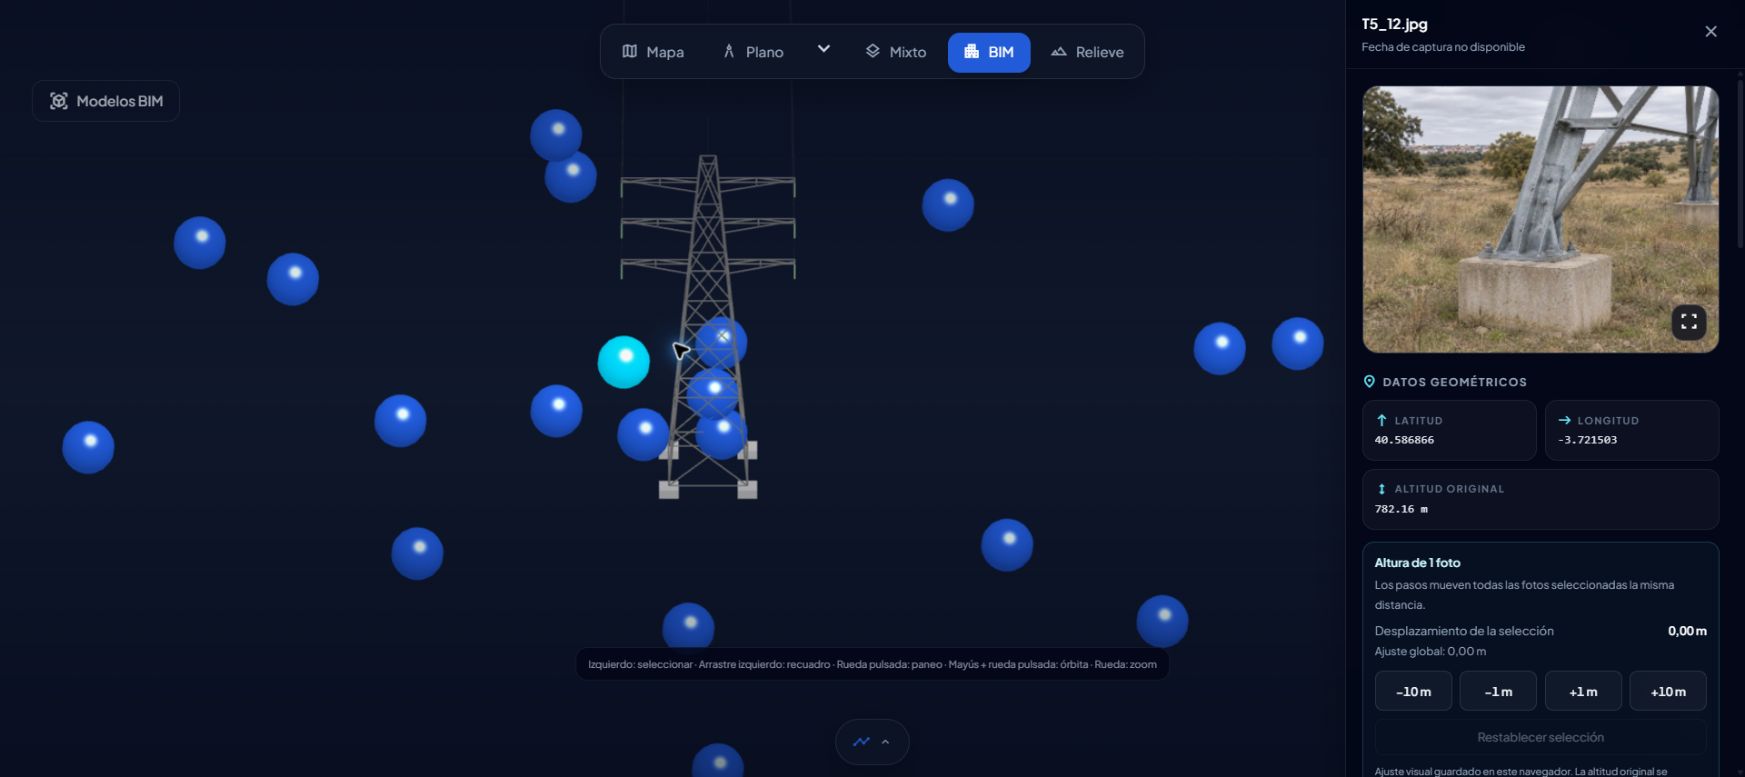
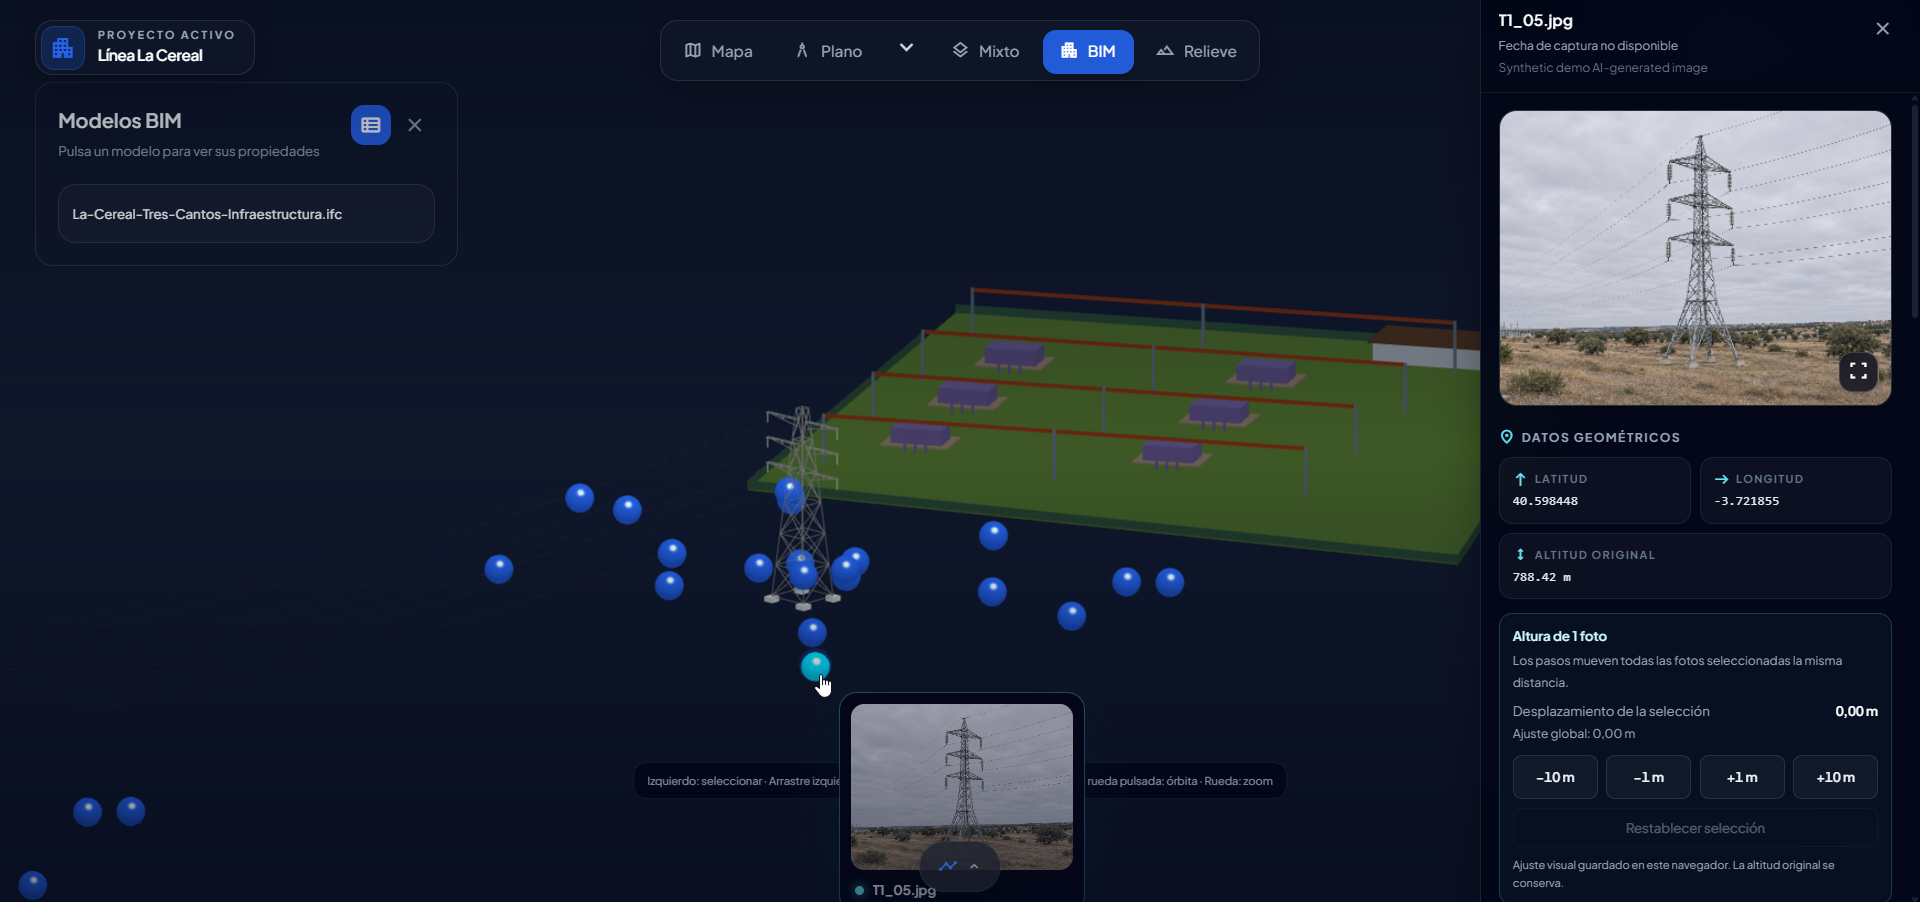
BIM
We continue with the model. We open the photo of the pylon next to the BIM model and compare the two views. The detail stops being an isolated image: we can place it in the tower as a whole and check it against what the model shows. It is a visual check, photo and model at the same time, without one view replacing the other.
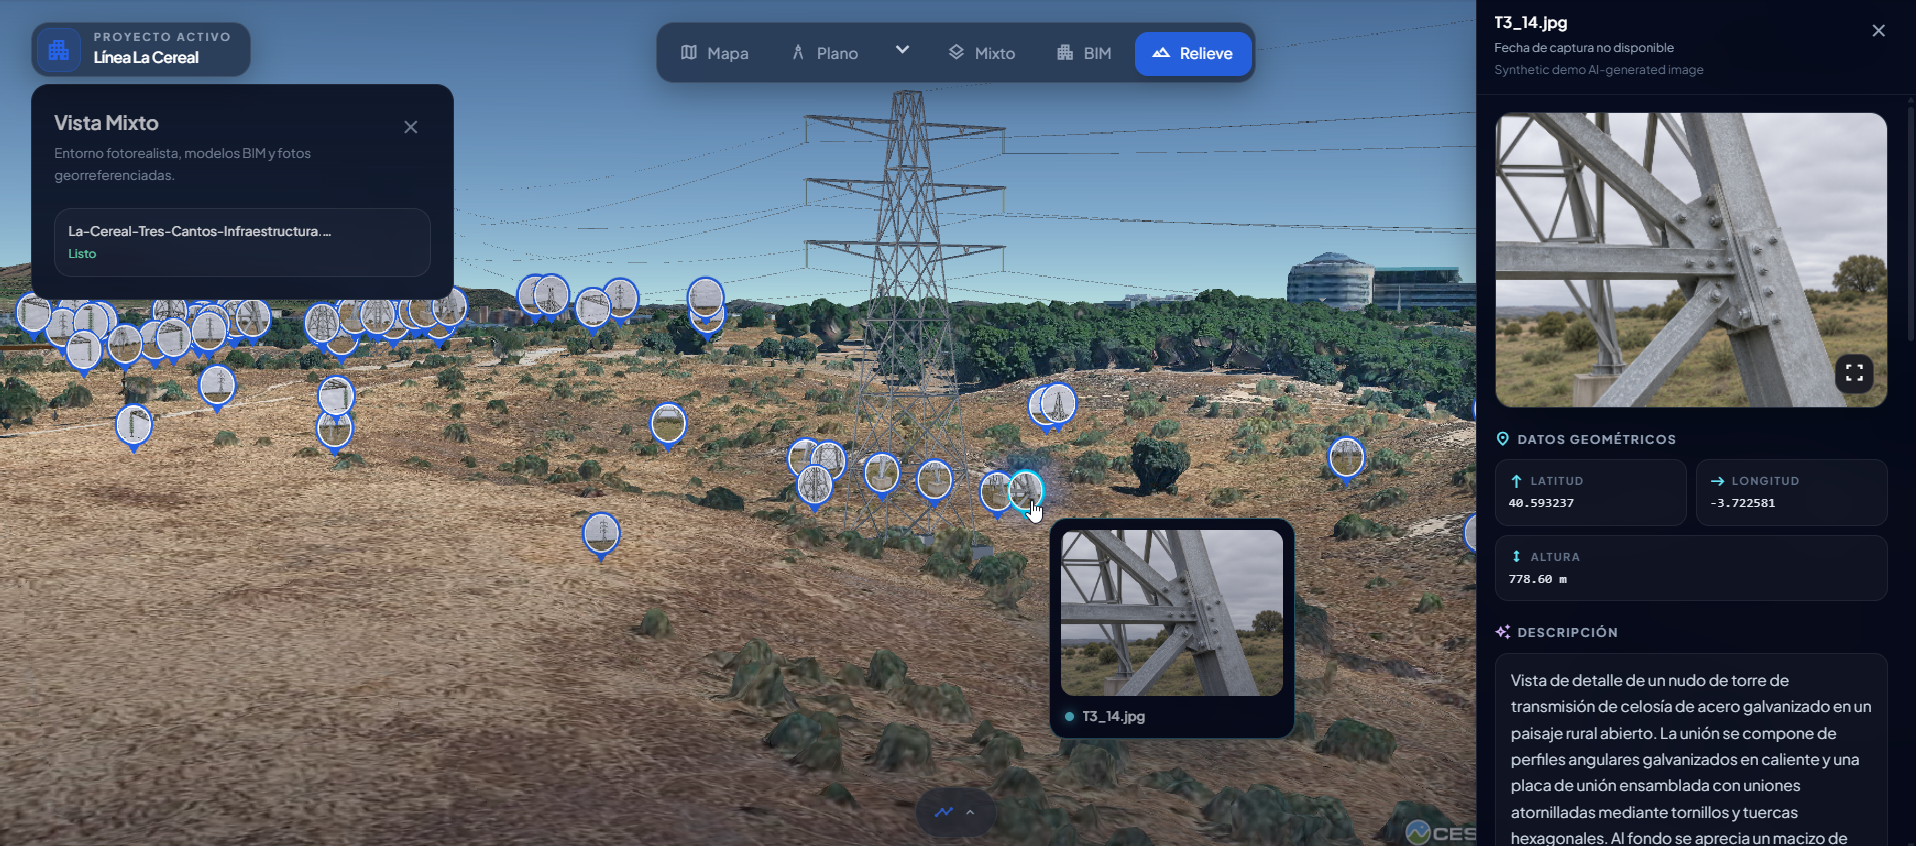
Terrain
We finish with the wider site context. The terrain view shows the ground with photos positioned on it, bringing a foundation detail and its location together. This helps us locate the pylon in the surrounding landscape and review photo coverage: which towers have images and where the record could be completed. From insulator to map, without switching tools.
If you document pylons or look up their history, you can follow this same flow with your own material and come back to it whenever you need.
The visual memory of your site.